
You plant a little black, brown, or tan seed in the soil, carefully water it and wait for it to grow. It may take a few days or weeks, but you check your seeds and see something poking through the soil one morning. It’s exciting to know that something so wonderful that lives, grows, and produces flowers, vegetables, and fruit comes from such a tiny seed. If you’d like to get your kids or grandkids involved, there’s a great kit you can order here: www.TheOutdoorKid.com. It helps kids learn about gardening at an early age. Now, here’s a little information on how to start seeds this spring.
A little about seeds
Seeds have different germination times. That means the time it takes for them to break out of their seed coat, sprout, and grow. The packet your seeds came in will have a lot of useful information on it, such as days to germination, how deep to plant, how far to space the seeds, and more. It’s a good idea to read your packet and keep it for future reference. And, if you like the flowers, vegetables, and fruit, you’ll know the name so you can plant them again.
Here’s what you’ll need to start seeds
You’ll need a small container with holes for drainage. Peat pots, egg cartons, and yogurt containers can be used. The important thing is to have drainage holes in the bottom so the seeds won’t stay too wet. For yogurt containers, poke a few holes with a large nail.
Lightweight soilless potting mix. These mixes are made of peat moss, perlite, and coir — a stiff fiber from the outer husk of a coconut. This disease-free mix allows oxygen and moisture for seeds to germinate or sprout & grow. The soil in your backyard is too heavy for starting indoors and may contain diseases that are not good for your seeds.
Moisten your potting mix before filling your containers. It should be just damp, not soaking. Add just a little water at a time and use your hands to mix it up. It’s easier to keep your potting mix damp if you first moisten it.
How to start seeds
Fill the container with the mix to about a ½ inch below the rim. Follow the recommended planting depth for your seed. You can find this information on the seed packet. Use the eraser end of a pencil and poke a hole in the potting mix at the correct depth.
Lightly cover the seeds with potting mix and gently pat. Place your peat pots or containers on a tray, such as a plastic tray, yogurt lid, or pan. Any shallow tray to keep water from leaking onto your furniture or windowsill. Use a spray bottle and moisten your soil. Don’t over water or use a strong stream of water, or your seeds will move around.
Mark your seedlings with a tag, such as a popsicle stick. Write the plant’s name on the stick with a marker and place it in the peat pot or container.
Caring for your seeds
Place your seeds in a warm location, such as a sunny south-facing window sill, on top of the refrigerator, or other warm, sunny spots. Keep the potting mix moist and not too wet until the seeds sprout and start to grow.
Check the seeds every day. It won’t be long until you see the seedling starting to poke through the potting mix. Most seeds sprout in about 7 to 14 days. Once the seedling has leaves start to water more. Gently water from above, or sometimes watering in the tray works to moisten the mix from below.
Start seeds in soilless potting mix and not dirt from outside. It has everything your seeds need for a good start. Soil from outside may not be clean enough and too heavy for starting them indoors. You can plant them in peat pots. There are various sizes of these biodegradable (they break down in the soil) pots. You plant in the peat pot, and when the seedlings are big enough, you plant the pot and the seedling in the ground or container. There are also plastic flats and trays you can fill with potting mix. When the seedlings are big enough, you carefully take them out of the flat and plant them. Peat pots and flats are available through Amazon.com or home improvement stores.
What else can you use for seedlings?
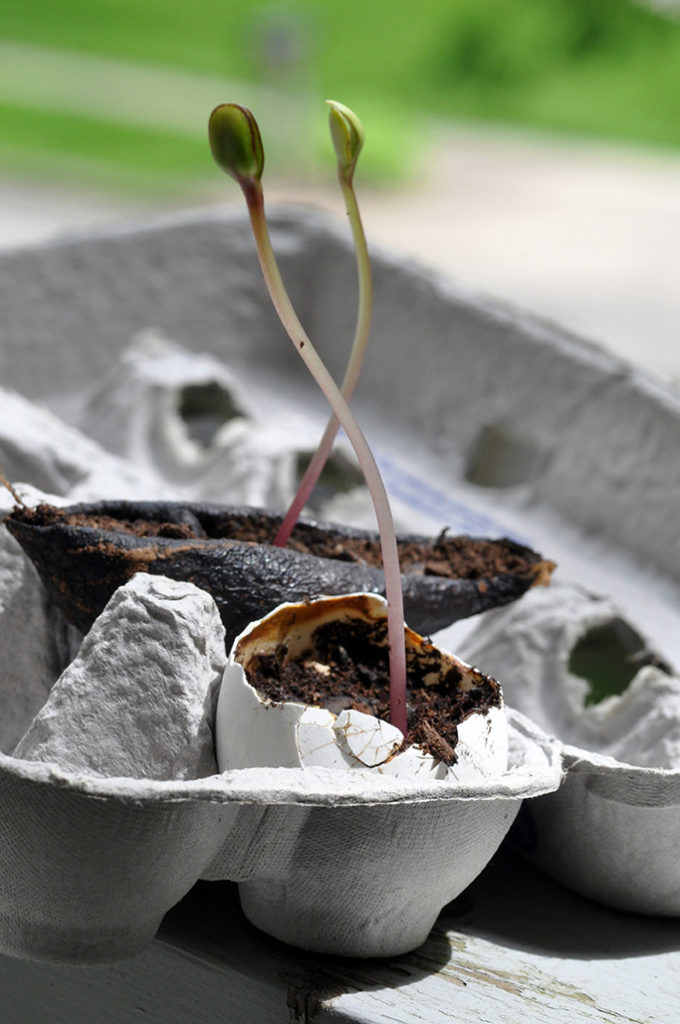
Most anything can be used to start seeds: eggshells, avocado skins, yogurt containers, and more. The important thing is to have holes in the container’s bottom so the seeds don’t get too wet and rot. Poke holes in the bottom of plastic and metal containers, such as yogurt cups and soup cans. Have fun with it and play around with different containers to see what works best for you. Then, plant your seedlings in the ground or a container, give them some care and love, and enjoy the flowers, vegetables, and fruit you grew from seed.
Do you deer problems, check out this article.
NOTE: As an Amazon Associate, I may earn from qualifying purchases.
